Inside the Box
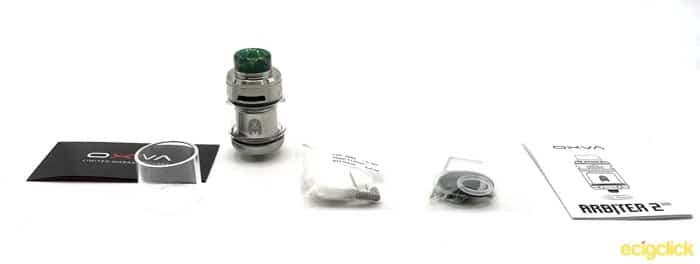
- Arbiter 2 RTA w. bubble glass
- Straight Glass
- 2x Ni80 Fused Clapton Coils @ 0.4Ω, 6 wrap, ID 3mm
- Shoelace Cotton
- Spares Bag, including grub screws, allen key, 510 drip tip adapter
- Manual and Warranty Card
Specs
- Dimensions – 26mm (24.5mm at the base) x 52mm
- Weight – 77g
- Coil – Dual or Single
- Airflow – Top to Bottom Fanned Airflow
- Capacity – 5ml (bubble glass), 3.5ml (straight glass) or 2ml (TPD)
- Drip Tip – 810, with 510 adapter
Design and Build Quality
The Arbiter comes in 5 colours, Stainless Steel (which I am reviewing), Black, Golden, Gunmetal and (eurgh) Rainbow.
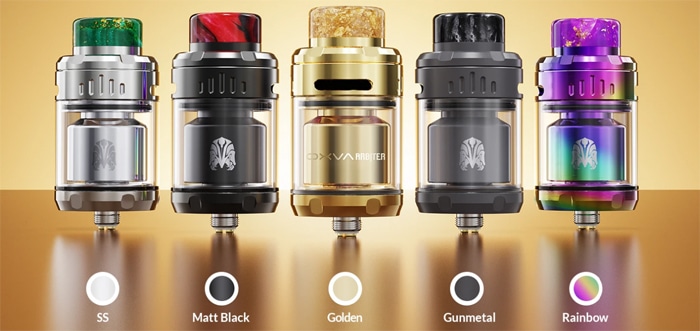
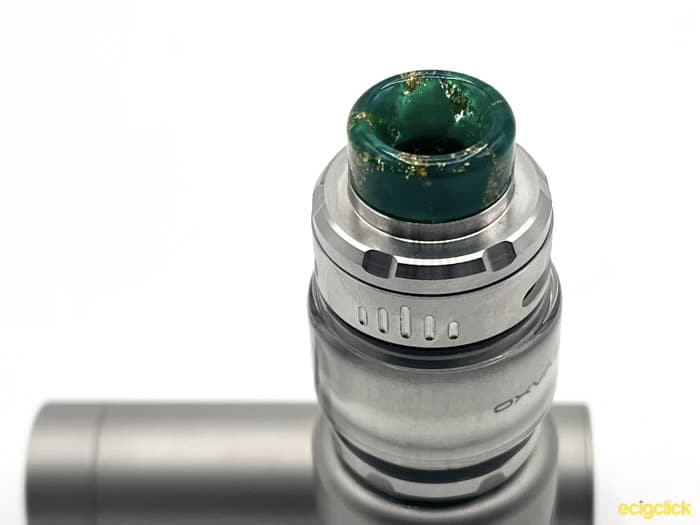
It comes with a different coloured 810 drip tip, depending on the colour you get.
OXVA Arbiter 2 RTA Drip Tip
Speaking of the drip tip, this is one of the nicest that I have had come on an RTA.
I often change out my drip tips to be more to my preference, but this one is decently long, very comfortable, and looks the business.
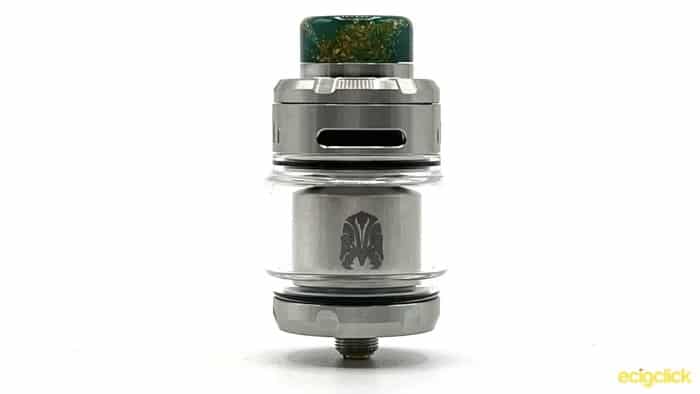
Of course if you don’t like it, you can swap it out for your preferred 810, and because they include a 510 adapter, you could even put a 510 drip on it.
One thing to be aware of, and it is a slight con, is that the drip tip surround stands up above the top cap a little. This means that if you put your own 810 on that happens to be much bigger, it can overhang slightly.
Not a massive issue, as I love the drip tip it comes with. But your mileage may vary.
OXVA Arbiter 2 RTA Top Cap
The top cap is a quarter turn, bayonet fit.
Although it’s relatively short (as they also have to fit the airflow in at the top), I didn’t find any difficulty in opening it.
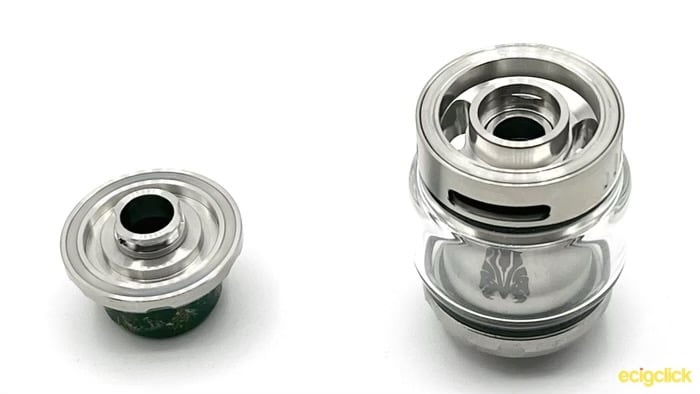
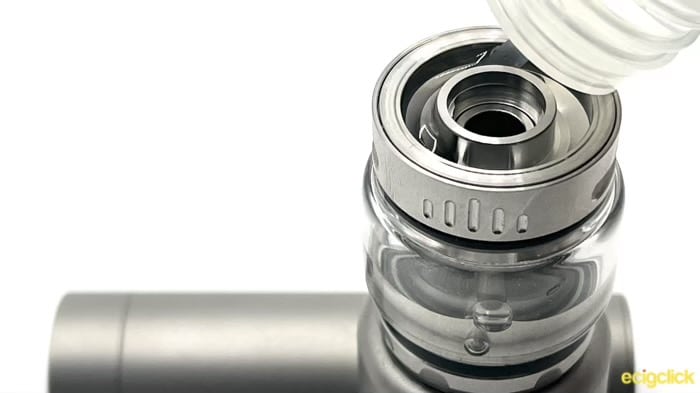
With the top cap off, you’ve got two nice large kidney shaped fill ports, and I’m pleased to see that they continued to keep the metal around the fill ports slanted like they did on the original.
This means that if you get overly enthusiastic with filling and some liquid ends up around, rather than in, the fill ports. It will naturally collect and run down into the tank.
It’s a small thing, but it speaks to really thinking about the details.
OXVA Arbiter 2 RTA Airflow
As this is a top to bottom airflow, your air comes in just underneath the top cap.
You’ve got mirrored cyclops air inlet, one on either side, and a nice grippy section to adjust it between them.
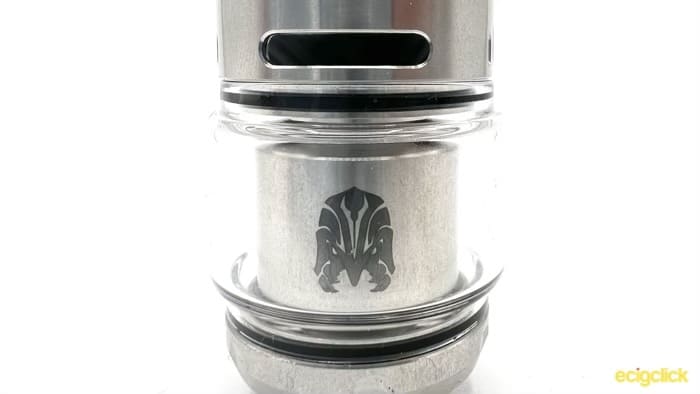
Looking at the size the of these, there’s going to be a lot of air coming in, so I’ve got high hopes for some big clouds!
Of course having top airflow also means that this thing is pretty much leakproof, always a pro in my book.
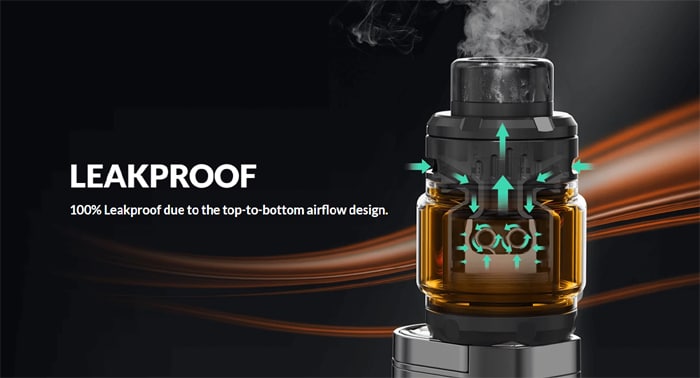
If we look inside the top section of the RTA you can see that there is a double walled evaporation chamber. The outer wall is the barrier between your liquid and the deck, then the inner wall is what directs the airflow.
Unlike in the original Arbiter this inner wall isn’t removable. I quite liked the fact I could totally disassemble the original, but this does mean that you’re never going to forget to put it back in place.
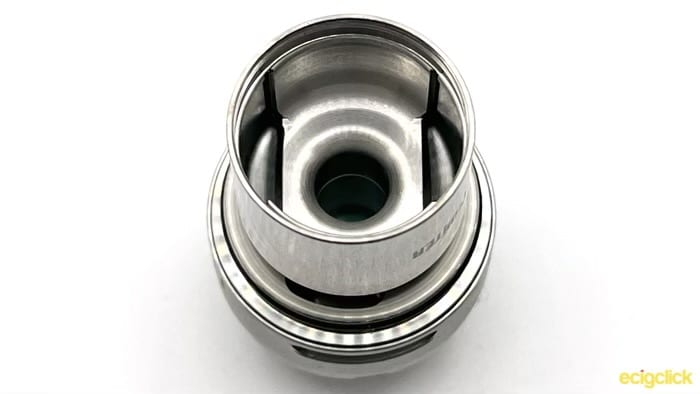
It comes down from the top, is prevented from hitting the open ends of the coils (as the inner wall protects these) and instead is forced to the side.
OXVA Arbiter 2 RTA Deck
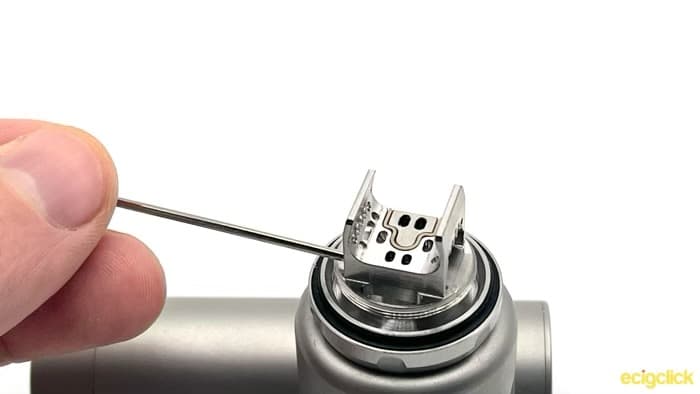
With the deck you can now see where that airflow goes.
It comes down the sides of the coil and will go into the fanned airflow, giving you side airflow.
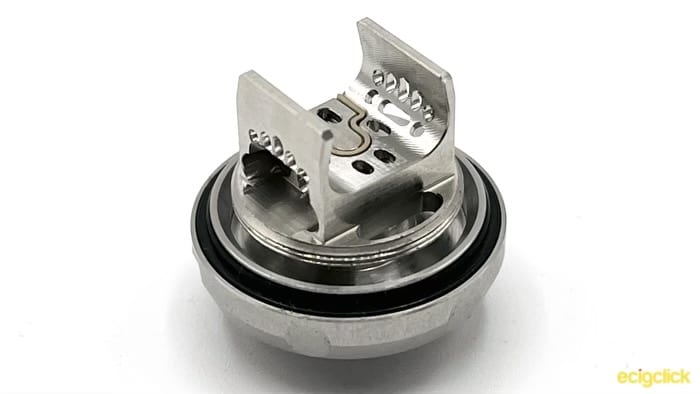
You’ll notice that the 5 holes for your airflow (mirrored on the other side) are biggest in the middle, getting smaller as they go towards the end of your coil.
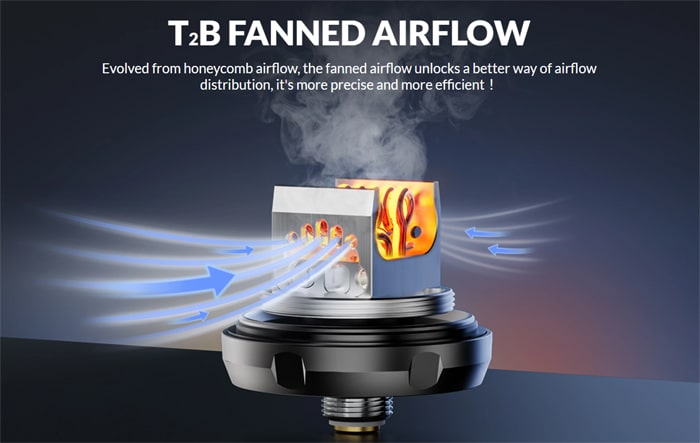
This means that the most airflow will be hitting the centre of your coil, but it is also spread out all the way along the length.
If you compare it to where the holes are for your legs, you’ll see that it extends the full length of your coil.
There is also bottom airflow, with the air traveling through a channel to come up directly beneath your coils at a slight angle.
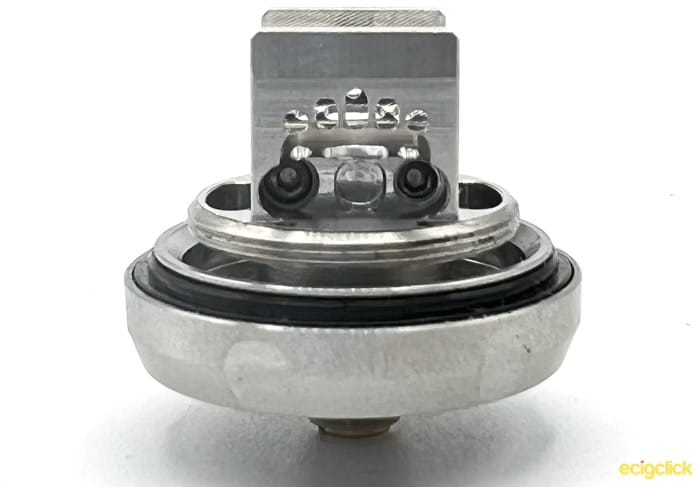
So just to recap, this is a top airflow tank, with the air hitting the full length of your coils from the side, and an angle bottom airflow for the centre!
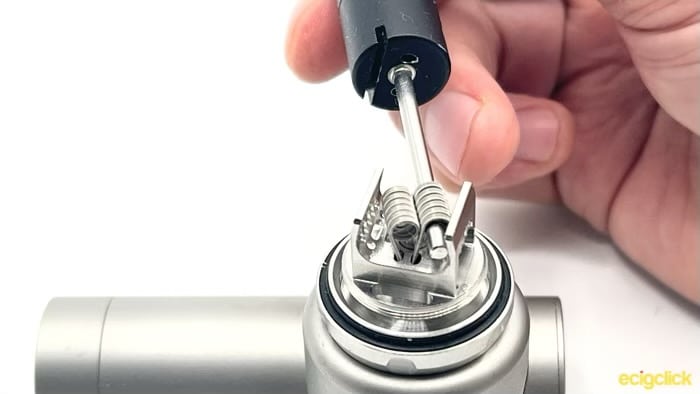
As a postless deck, a couple of things to note is that the depth of the post holes are relatively shallow. I cut my legs to 5mm in my build tutorial, but you could easily cut them shorter (4 or even 3.5mm).
OXVA Arbiter 2 RTA Base
The base has all your expected regulatory marks, as well as the name of the RTA and Justin Lai’s signature (CEO of Oxva).
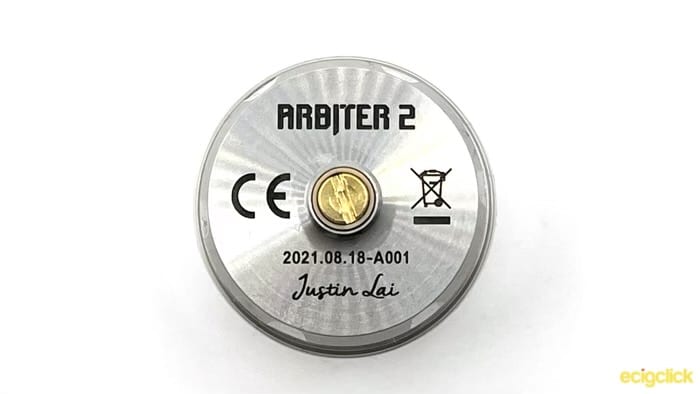
There’s a decently protruding gold plated 510 that is removable.
How to Build the OXVA Arbiter 2 RTA
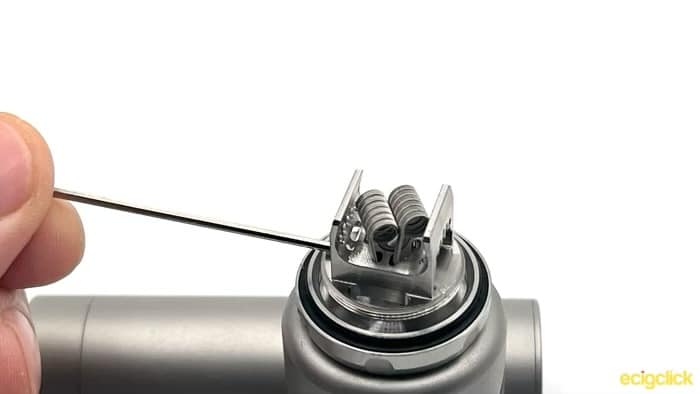
- Use an Allen key to unscrew the grub screws
- Snip your coil legs, I used a Coily tool to trim mine to 5mm, but I would say this is the maximum length you want, as the post holes are quite shallow
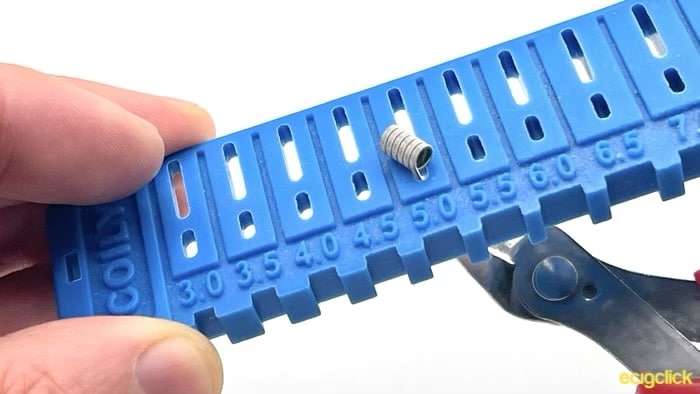
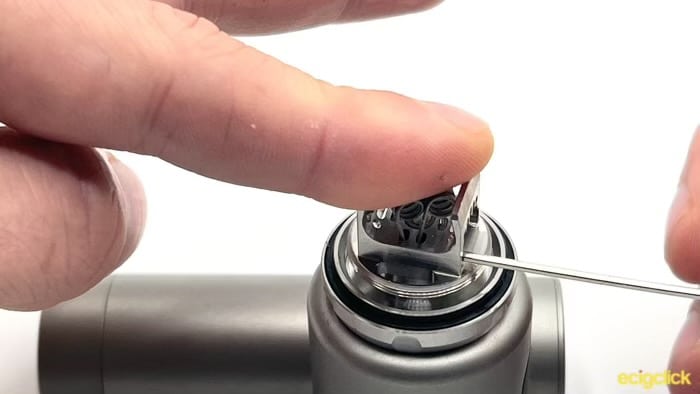
- Place your coils and tighten up the grub screws
- You can use a finger on top to keep them in place whilst you do this, don’t worry if they get pulled into odd angles, we can sort that in a moment
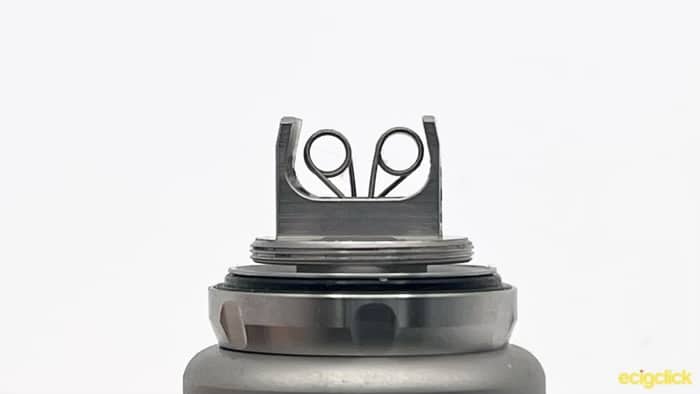
- Use a coil jig to straighten and position your coils
- You don’t want these too close to the outside, as the bottom airflow comes up at an angle, after experimenting I actually put them closer together than in my photo
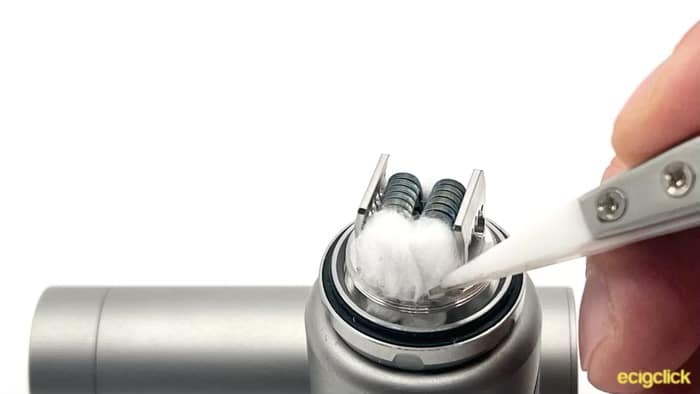
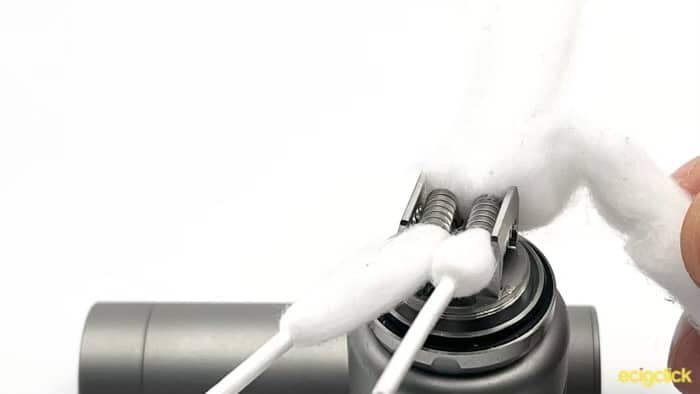
- Insert your wick
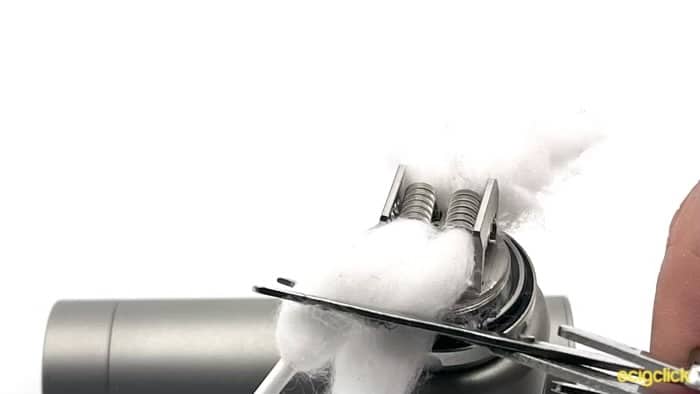
- You can thin out your wicks a little, then trim them so they will drop into the wick ports
- Place your wicks into the wick ports, try not to compress them as you do this, or you will end up with dry hits.
NB. I did not thin my wicks out on this first build. BIG mistake on my part.
I think the wick ports are just a little too small, so it can get choked, so thin your wicks if you’re running it in dual coil mode.
My second build performed flawlessly, but I didn’t take a photo!
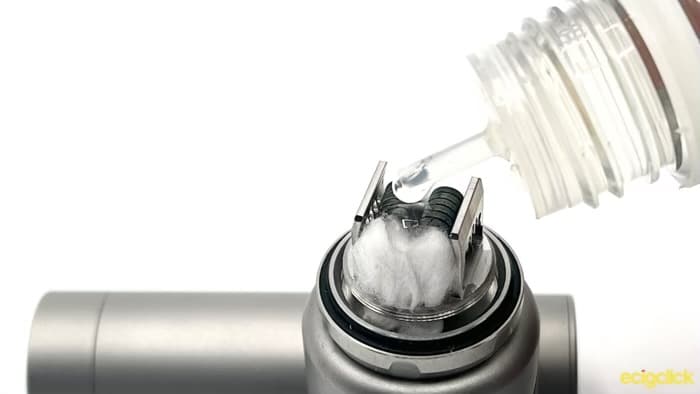
- Prime you coils with plenty of liquid
- Reassemble and fill up
- Put the top cap back on, and you’re good to go!
How Does the OXVA Arbiter 2 RTA Perform?
I’ve been using this for a little less than two weeks now, and not to spoil my conclusion, but I think this might be one of the best dual coil RTAs I’ve ever had the pleasure of using!

I’ve been using a variety of e-liquids, some Fizzle, some HKD and both Jack Rabbit, and Rachael Rabbit to get a good idea of how it handles different flavour profiles.
I also have used both dual coils and running it as a single coil RTA.
OXVA Arbiter 2 RTA – Airflow and Cloud Production
There’s always a risk with top to bottom airflow, because the air has to travel a much longer path to your coil, it can become a bit diffuse by the time it hits it.
Also, it opens up lots more possibilities for things to get turbulent and/or noisy.
So it’s really impressive that the Arbiter 2 doesn’t have any of these flaws!
There’s plenty of airflow to feed the two coils, it’s just slightly restrictive rather than fully open.
Where 10 would be fully open and 1 is totally closed, this is a 9. If you like a little more restriction, then closing it down is plenty easy and it doesn’t suffer from it at all.
On a lot of tanks you find that there’s a specific airflow that it works best at, that’s not the case here, so find what you prefer and enjoy.
Surprisingly smooth throughout it’s range, despite the ups, downs and throughs that the air is making!
Really good airflow, and bags of cloud production, even at relatively pedestrian wattage, you don’t need to crank this up high to fog out a room!
OXVA Arbiter 2 RTA Flavour
Can I just say again, “Wow”?
Seriously impressive flavour from this thing.
I’ve now tried it out in both single and dual coil configuration. The two coils that it comes with came out to a 0.18Ω, and I loved these at about 70W, but you could easily push it much higher.
The one area where you might get a bit of a dip in flavour is if you don’t get your wicking right.
You need to make sure that the coils get enough e-liquid to them, so if you find that you’re getting a dry hit at all, chances are you need to thin your wicks a little more.
This was definitely my fault on the first build, and now that I’ve tested it as a single coil, I actually don’t think they should have increased the size of the wick ports as anything bigger would be too large for a single.
When there’s plenty of e-liquid coming through, I honestly couldn’t fault the flavour. Custards were custardy, fruits were fruity, and cooling froze my brain.
The thing is, I didn’t even try out any particularly interesting coils in this.
Everything I used was a machine made fused Clapton or similar. So I’ll be continuing to use this, but I’m really curious to see if it can get any better (seems unlikely!) with a couple of nice aliens.
Pros
- Top flavour
- Big clouds
- No leak airflow
- Easy to use (just remember to thin your wicks!)
Cons
- Ummm…?
- I’m not the biggest fan of the branding, I think it cheapens the look slightly
- The drip tip surround can make some larger drip tips overhang
Final Review Verdict
Additional information
| Color | color 1, color 2, color 3, color 4 |
|---|




Reviews
There are no reviews yet.